Customise MonIc service on your boards
MonIc service enables you to sync, manage and view all your activities on monday.com with your iCount account, so you won't need to switch platforms to complete your tasks.
MonIc service works with three boards:
1. Contacts or Clients
2. Clients Projects
3. Inventory (not mandatory)
Once you customize the service, you will be able to:
- Automatically create clients and inventory items
- Generate and manage documents for each client
- Handle payments efficiently
By integrating MonIc with your monday.com boards, you streamline your workflow and improve productivity.
Before we start, it's important to note that if you already have the columns set up in the types mentioned here, you can use them. In this guide, we will mostly create these columns.
For the Inventory board, we need to create the following columns:
-
Description, type: Long Text
This column will hold a detailed description of the item. -
Inventory (in stock), type: Numbers
This column will represent the number of available items. -
Cost, type: Numbers
This column will represent how much it costs your organization to produce this item. -
Price, type: Numbers
This column will represent the amount your organization wants to collect for the item. -
Status, type: Status
MonIc requires one specific status value: 'Imported from iCount'. It needs to be this exact value and is case-sensitive. -
iCount Item ID, type: Text
This column will be updated by MonIc with data from iCount, populating the item ID given in iCount for this item. -
SKU, type: Text
This column will hold the Stock Keeping Unit (SKU) value. -
ALT SKU, type: Item ID
If you do not set the SKU value, MonIc will use the item ID instead. You will always have the ability to update the SKU.
Next, let's set default values. Set the Inventory, Cost, and Price columns to automatically be 0 upon creation.
Inventory
For the Contacts/Clients board, we need to create the following columns:
-
Company Name, type: Text
This column will hold the name of the client company. -
Company ID, type: Text
This is the actual finance entity ID, the client company ID. It is not the monday.com ID or iCount ID. -
Status, type: Status
MonIc requires one specific status value: 'Imported from iCount'. It needs to be this exact value and is case-sensitive. -
Phone, type: Phone
This column will hold the client's phone number. -
E-mail, type: E-mail
This column will hold the client's email address. -
iCount Client ID, type: Text
This column will be updated by MonIc with the client ID generated in iCount. -
Pay Page URL, type: Text
This column will be populated with the payment URL, should you want to send it to your clients.
Contacts/Clients
For the Clients projects board, we need to create the following columns:
-
Description, type: Text
This column will hold the project description. -
Connected Board Column, connected to Clients
Add one mirror column reflecting the Company Name. Please make sure this column is not enabled for multiple selection. -
Status, type: Status
We recommend adding a specific status column rather than using an existing one, as we have several statuses to add here. Note, the status values need to be in the exact text shown here and are case-sensitive. The status values are: 'Ready', 'Paid', 'Offer', 'Deal', 'Invrec', 'Receipt', 'Invoice', 'Refund', 'Order', 'Pay page Url created', 'Cancelled' and 'Closed'. Colors are of your choice. -
Inventory, type: Connected Boards
Connect this column to the Inventory board. -
Mirror Columns, connected to Inventory:
Add two mirror columns named 'Available' and 'Price'. -
Quantity, type: Number
This column will represent the number of items for this project. -
iCount Doc ID, type: Text
This column will be auto-populated by MonIc with the document ID from iCount.
Let's set the default value to 0 for the quantity column when creating an item.
Clients projects
Now we need to let MonIc know what the common ground is for the process between monday.com and iCount. This means we just need to take the columns and boards and map them into the MonIc service. Don't worry, we created a process to do this easily.
On the Contacts/Clients board, open the item view and click the "+" to add a new view. Click on 'Installed Apps' and look for MonIc. Then you will have the option to select the view named 'MonIc - iCount Client View'.

This is the screen you will see. We are not using the MonIc predefined template; we are customizing the service, so click 'Let's Get Started'. (We recommend setting this view as the default view for the Clients board).
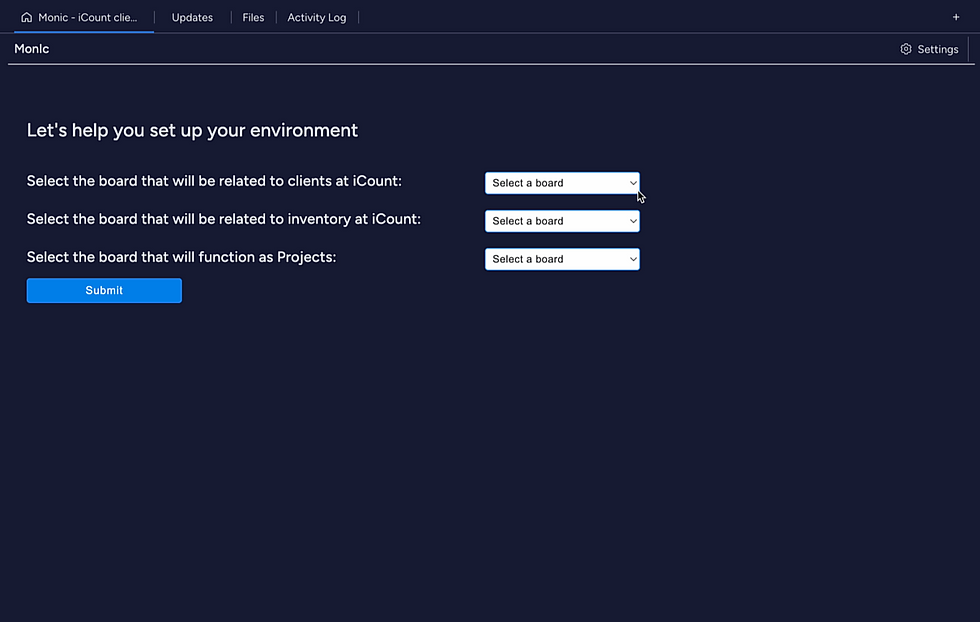

This is the screen you will see. Follow the prompts and attach the relevant boards and their columns (the columns we just created in this guide).
Automations
We need to create two automations: one for the Inventory board and one for the Projects board.
Inventory board:
-
Select the Inventory board and click 'Automate'.
-
Click 'Integrations' and search for 'MonIc'.
-
Click on 'MonIc - iCount Trigger'.
-
Select the rule 'When any column changes, update inventory at iCount'.
-
Finally, click 'Add to Board'.
Projects Board
1. Select the Projects board.
2. Click 'Integrations' and search for 'MonIc'.
3. Click on 'MonIc - iCount Trigger'.
4. Select the rule 'When a column changes, update iCount'.

5. Select the rule 'When a column changes, update iCount'.
6. For 'Column', select the Quantity column we set
That's it! We've finished customizing the MonIc service. You can check out the video here, which contains this guide and examples of how to work with the service at the end of the video.
Don't hesitate to contact us with any questions or for support. We can provide online support to help you set up the service - its free.